Showing posts with label Kid Activities. Show all posts

Wednesday, July 3, 2013

"Gak"

Sometime in the '90's I was gifted with "Nickelodeon gak" for Christmas from my grandma.  Now gak is back!  (Don't watch that video too many times or you'll be singing about "gak gak gak" all day.)  Anyway, earlier in the week there was a steady rain most of the day and we were homebound since Michael was napping.  To keep kids occupied we made "gak."  

To make your own, you need:

1 cup of glue
3/4 cup cold water
liquid food coloring
1/2 cup hot water
1 teaspoon borax

In one bowl mix together the glue, cold water, and food coloring.  (We chose yellow.)
In another bowl mix together the hot water and borax until the borax is dissolved.
Next, pour the glue mixture into the borax mixture.  
Stir together as best you can and then pour out any  excess water.  

Then squish, stretch, and comment that you feel like you are playing with a squashed Spongebob, or mixing up eggs.  


Our gak kept Clare and Jude busy for about an hour.  Then Jude played with it more later.  And then asked to play with it again the next day.  


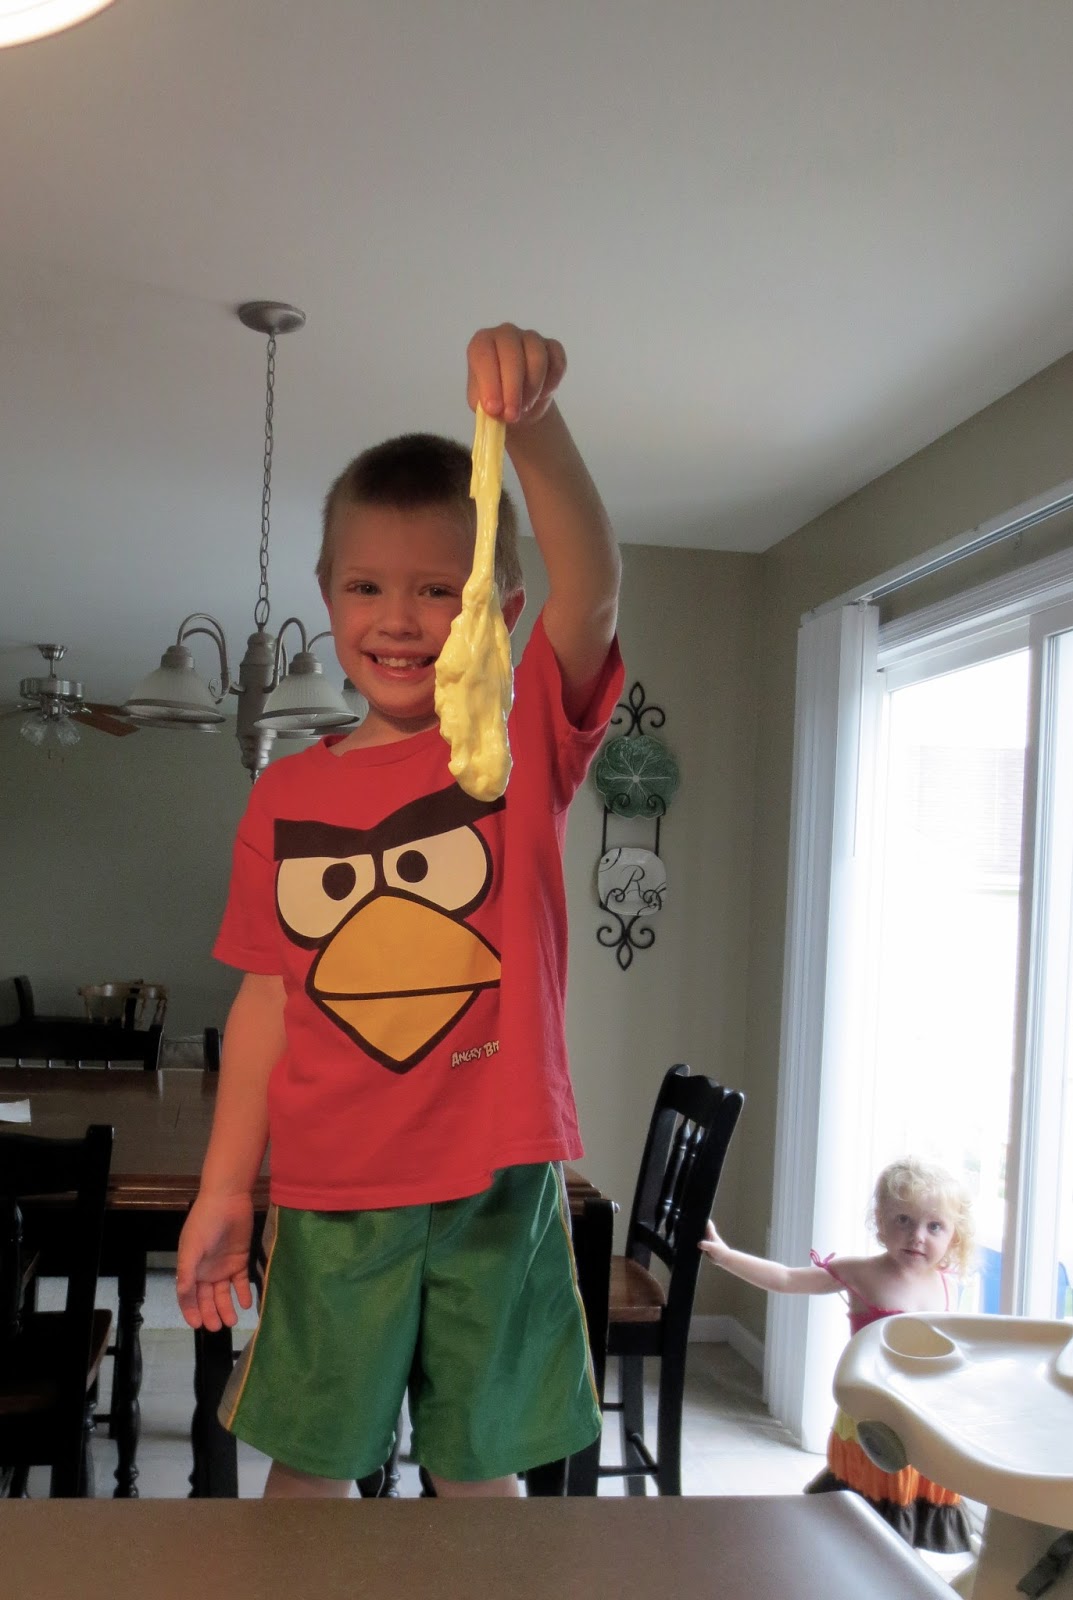
 Ellen, on the other hand, wouldn't even touch it!  
(As you can see...she's staying as far away from it as possible!!) 


1990's rainy day fun!

Recipe found here.


Wednesday, January 23, 2013

Mr. Snowman


We ventured out in the cold to the library the other day and had fun with this craft.  We have had cold temperatures, but not many  flurries.  (OK with me, not so much fun for those that are itching to use our sleds!)

To make the "snow" for a snowman, mix equal parts of white glue and shaving cream.


Do not make the mistake of tasting it like Ellen did...


...because in no way will it taste good.

We piled the snow on the outline of a snowman, then added accessories.  


He's nice and fluffy like real snow...and maybe was a foreshadowing of yesterday's weather!?!?


Tuesday, November 13, 2012

Sensory Table

I was lucky to inherit a Little Tykes table from a neighbor last spring.  The table has a lid that comes off to reveal 2 compartments underneath.  The kids have enjoyed hours of entertainment on the deck in the summer when I fill the table with water and bubbles and any kind of waterproof toys.  


With colder temperatures ahead, I wiped down the table and put it in the basement this weekend.  Right now it's filled with our dry beans (thankfully Ellen is beyond the age of putting these in her mouth) and some small plastic animals.  


Other objects that might appear in our sensory table this winter include
rice, packing peanuts, and craft pom-poms.  

Friday, September 7, 2012

Ways to Help Preschoolers Build Hand Muscles

Jude will be in kindergarten next year.  (Yikes!)  His pencil grip needs some work and to help him develop the muscles in his hand to make writing easier, I've researched some ways to help him do so...

1. Find beads in playdough or silly putty.  I "hide" a certain number of beads in playdough and let him search for them.  He especially likes it if I put in a special gold bead for him to find.

2. Carry tote bags.  We like filling our reusable grocery bags with cardboard blocks or large balls and carrying them around.

3. Use a spray bottle.  My kids love playing with spray bottles.  From helping clean the bathrooms to "watering" the flowers outside, a $1 spray bottle is a great investment!


4.  Use scissors.  Jude likes to cut playdough "snakes" and junk mail.

5.  Play with sponges.  We fill our outdoor water table with soapy water and sponges (also a Dollar Tree investment) and have fun squeezing bubbly water out of the sponges.

6.  Use clothespins.  Jude likes to clip a bunch of clothespins on pipe cleaners.  But they could pretty much be stuck on anything!  (Yes, he's a leftie....Aunt Margaret needs to come in town when it's time to learn to tie shoes!)


7.  Open jars.  I have several old spice jars that I have washed out that the kids like to play with.  The lids on them are the perfect size for small hands.    

And that's about as homeschool-saavy as I get.  Hoping this helps him and we are soon writing our name like a pro!

Happy Friday!

Go visit Jen for more Quickies!  


Thursday, July 12, 2012

Ice Cream in a Bag

I found this recipe for homemade vanilla ice cream in Family Fun and the kids enjoyed making our very own ice cream (no ice cream maker needed!).

Ingredients:
2 tablespoons sugar
1 cup half and half
1/2 teaspoon vanilla

Combine ingredients in a sandwich baggie and seal to close.  


Place 1/2 cup coarse salt in a gallon-sized freezer bag, then fill with ice cubes.  


Place smaller bag inside larger bag and seal the freezer bag.  


Shake for about 5 minutes.


Open and enjoy!  


(This made enough ice cream for 2 children-sized cones.)

A tasty afternoon activity and treat!


Linking here.


Wednesday, July 11, 2012

Learning to Tie Shoes

One of the things Clare has been working on this summer is learning to tie her own shoes.  I came across this idea on pinterest and we made our own version.


I took a sturdy piece of cardboard (a cereal box would work) and drew the shape of a shoe on it, poked 8 holes in it, and laced a shoe-string through. 


We'll be ready for 1st grade in no time!

Linking here.
todayscreativeblog.net
http://betweennapsontheporch.net/

Tuesday, June 19, 2012

Ice Blocks, Take 2

My kids enjoyed playing with these ice blocks last summer.  


I decided to put a twist on this idea (thanks to pinterest) and made ice blocks last week with small plastic animals frozen inside.


The kids chiseled away for...45 minutes!


Kept them cool and busy and happy!  


 I'm going to be keeping a stash of frozen ice blocks in my freezer all summer!

For more summer activities click here and here.


And don't forget to enter my current giveaway here!


Linking here.  
betweennapsontheporch.blogspot.com 


Wednesday, June 13, 2012

Our Summer Reading Getaway

I brought the tent from Santa into the loft the other day...


...and stashed it with books for everyone.  


They added their own blankets and pillows...  


...and have really been enjoying this new reading space!


Thursday, May 3, 2012

Kid-Friendly Cards

Clare is at a fun age where card games are starting to interest her.  
Uno is one of our favorites right now.

image

The only problem is that small hands sometimes have trouble handling a lot of playing cards.

We have solved this problem by making a "card holder" that I found on pinterest.


Simply take two lids from the same product and staple them together in the center.


The lids I used were larger, so I also hot glued around the staple to keep the cards snug in place.  Press together and let hot glue dry. 


Then just stick the cards in between the two lids and they stay put and are easy for a young card player to manage.


Bring on game night!  


Monday, March 26, 2012

One of My Favorite Babysitters...

I will openly admit that I am guilty of using the TV as a babysitter for my 18 month-old.  But there are times during the day when I need to get something done and she needs to be distracted from me.

We found this DVD series at our library when Clare was a baby and all of our kids have loved them...and still do.  (Produced by Small Fry Productions.)  


They are 30 minute educational videos and instantly glue all 3 of my kids to the TV screen.  (Which also makes them perfect for long car trips.  They are something that will entertain the baby, and that the older kids are also fine watching.) 


So without further ado I highly recommend these DVDs!  The series includes: Colors, Shapes, Opposties, Letters, Numbers, Food Fun, Seasons, Animals, Sounds, and Head to Toe

Thursday, January 26, 2012

Shower Curtain Road Map

With the doldrums of winter settling in, Jude and I made this road map together.  (Originally pinned here.  They have an easy idea for making your road width the same on the entire map.)  
I bought a white shower curtain liner from the Dollar Store.  We spread it out on the basement floor and drew the road to our city (by no means an accurate representation.)  


Then we added some of our favorite places around town with a black sharpie marker.


The kids have slowly started coloring in some of their favorite places.  

I wish we were able to stop by the pool right about now!

And a famous race car has been making frequent visits all over town!


And even making pit stops in our driveway!


Total cost for cabin fever entertainment...........$1!

Linking with these parties.